Friday, December 12, 2008

Fabulous Holiday Dessert

Here is a recipe for a delicious and decadent holiday dessert that will impress all of your party guests! I make this every year and everyone loves it. Plus the leftovers make an excellent breakfast the next day!

Panettone Bread Pudding with Amaretto Sauce
by Giada De Laurentiis

Cook Time: 50min
Level: Easy
Yield: 8-10

Sauce Ingredients

  • 1/2 cup whipping cream
  • 1/2 cup whole milk
  • 3 tablespoons sugar
  • 1/4 cup amaretto liqueur
  • 2 teaspoons cornstarch

Bread Pudding Ingredients

  • 1 (1-pound) loaf panettone bread, crusts trimmed, bread cut into 1-inch cubes
  • 8 large eggs
  • 1 1/2 cups whipping cream
  • 2 1/2 cups whole milk
  • 1 1/4 cups sugar

Directions

To make the sauce: Bring the cream, milk, and sugar to a boil in a heavy small saucepan over medium heat, stirring frequently. In a small bowl, mix the amaretto and cornstarch to blend and then whisk into the cream mixture. Simmer over medium-low heat until the sauce thickens, stirring constantly, about 2 minutes. Set aside and keep warm. (The amaretto sauce can be made 3 days ahead. Cover and refrigerate. Rewarm before serving.)

To make the bread pudding: Lightly butter a 13 by 9 by 2-inch baking dish. Arrange the bread cubes in the prepared dish. In a large bowl, whisk the eggs, cream, milk, and sugar to blend. Pour the custard over the bread cubes, and press the bread cubes gently to submerge. Let stand for 30 minutes, occasionally pressing the bread cubes into the custard mixture. (Recipe can be prepared up to this point 2 hours ahead. Cover and refrigerate.)

Preheat the oven to 350 degrees F.

Bake until the pudding puffs and is set in the center, about 45 minutes. Cool slightly. Spoon the bread pudding into bowls, drizzle with the warm amaretto sauce, and serve.

Thursday, December 11, 2008

Pretty Gifty

Thanks to my lovely DVR (best invention ever!) I had taped a bunch of Holiday specials on the Food Network and while watching "Paula's Cookie Swap" last night I learned some great tips for packaging cookies. I thought they would be helpful for those of you giving cookies or other treats as gifts this holiday season!

1. Chinese Take-out boxes are an excellent, unexpected way to package those sweets for the sweet! They only cost about $1 at most local craft stores and some may even be less then that. I know our local Michael's sells them in solid colors in packages for about $5.99. If you use one of those 40% off coupons you'll get a great deal! When packaging your cookies, add a little paper shred in the bottom of the container. Also make sure to purchase a couple sheets of food-safe paper, such as Vellum, and cut it into little squares a little smaller then the cookies. As you place each cookie, or each layer of cookies in the container, add a sheet of the paper in between so they don't stick to each other. After you have filled your container add embellishments such as ribbon and an ornament to make it more festive!

2. Glass jars are also a great option. You can either put your treats into the jar as is or you can cut templates out of Vellum paper to match the size (height) of the jar and wrap it around the inside. You can add stickers, a strip of ribbon in the center, or anything else you desire to personalize the paper. To add your liners in between the layers, use the bottom of the jar as a template to cut matching circles from the Vellum. Use the circles as your liners between your treats. Add a ribbon or other embellishment around the top of the jar or handle if it has one on the lid.

3. When making cookies that require you to slice them from a log of dough, cut them a tad thicker and insert oven-safe lollipop sticks (available at your local craft store) before cooking. Once they are done, you have adorable cookie Lollipops - a treat that someone special is sure to remember! Just make sure to place a treat bag or cellophane wrap around the cookie and tie at the base with a ribbon to keep them fresh. To give as a gift, you can peruse your craft stores, dollar stores and even stores such as Target or Kmart etc to find a deep bowl, pail, etc on sale. Add a small block of florist foam cut to fit into the bottom of the bowl or pail (about halfway up the side of the container). Stick the pops into the foam and put shred on top to hide it. Add embellishments such as ribbon around the top of the bowl or anything else you might like to add to personalize your gift!

And don't forget that the best way to ensure that your gift stays fresh is to make it 24hrs before you plan to give it!

I also found this great article on the Food Network website that features tips for keeping your food gifts fresh and also for shipping them! Here it is.......

Whether you're sending homemade treats to a neighboring town or across the country, here are some helpful tips to ensure it reaches its recipient in perfectly shipped shape.

Choose your gifts wisely. Do not mail highly perishable items such as dairy- or meat-filled foods. If you're sending baked goods, moist and firm, rather than brittle and delicate, ship well and arrive in the best form. Include a note on the best way to handle the food once it arrives. Holiday baked goods that travel well include:

  • Cookies: To prevent cookies from breaking, create a cushion on the bottom of the container with crumpled wax paper or parchment, and then layer the cookies, wrapped in airtight wrap or in zippered plastic bags with crumpled wax paper in between. Separate crisper cookies from moister to preserve textures. Cookie tins are really ideal ? find them at craft and hardware stores and also at yard sales and flea markets (just wash them well first).
  • Pound cakes, loaf breads, brownies and fudge: Bake in disposable foil pans and ship them in the pan. Cover the cooled pan with plastic wrap, place in a zip lock bag (leave air in the pan to act as a cushion, and then ship in a cushioned box. These baked goods may also be baked and shipped in decorative new pans, with the intention of including the baking pan as a gift, too.
  • Cakes and candies: pack compactly in tins. Candies should be placed in cups or layered on cushioned papers. Make sure there is no headroom or the confections may crack or crush.
  • Bottles of oils or vinegars or jars of chutney, sauces or jam: Before packing, make sure bottles are tightly sealed and packed in sturdy jars. Wrap the bottles or jars in bubble wrap and then place inside an air-filled zippered plastic bag. Pack the items in a shipping box lined with plastic wrap (a large plastic garbage bag works well), filled with crumpled newspaper, bubble wrap, foam peanuts or air-popped popcorn. Pack heavier items at the bottom of the box and make sure there is cushioning between each item. A good rule of thumb: Calculate two to three-inches of packing material on all sides for optimum cushioning. Pack the top of the box so there is no headroom or items may shift.

Always use sturdy, unused corrugated shipping boxes. Use packing tape to securely close the box. Fill out your labels with a waterproof pen. Mark the carton "perishable" and ship it via the fastest means possible.

Perfectly packed and properly shipped, you can be sure your treats will be welcomed with opened arms — and mouths.

I hope you enjoyed the tips I learned from Paula's Cookie Swap and the wonderful article courtesy of the Food Network website. More tips to come!

Happy Holidays!

Wednesday, December 10, 2008

Shop Til Ya Drop!

I have been getting some great discounts in my email inbox so I thought I would share! I will put them in order by experation date. Enjoy!

J.CREW - 20% off $100, 25% off $150 and 30% off $200 or more including sale items! Also includes Free Shipping on orders of $100 or more. Code: HOHOHO Expires 12/11

SNAPFISH - Free Shipping. Code: SHIP08 Exp 12/11

VICTORIA'S SECRET - 20% off entire order. Code: 20PERCENT Exp 12/11

GAP - $20 off $100 or more plus free shipping. Exp 12/14

SEPHORA - 15% off entire order. Code FYP96 Exp 12/14

AMERICAN EAGLE - Buy 1 get 1 at 50% off the entire collection. Additional 20% off your entire order! Code: 68491578 Exp:?

Happy Shopping!!!

Monday, December 8, 2008

Fun Holiday Craft for Kids

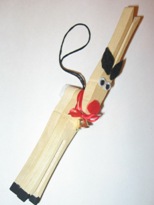
While thinking about fun craft ideas for my son's upcoming class holiday party, I had a fond memory of an adorable little ornament I made when I was in 1st or 2nd grade. I remember this little reindeer I made in class out of clothespins and it was the cutest little thing. So I decided to do a google search and peruse all the instructions for these charming little critters. They are really easy and inexpensive too!

Clothespin Reindeer Ornaments
You will need......

3 Clothespins
A set of googly eyes
A permanent marker in brown or black
A small sheet of felt in black or brown
A little pom pom, sequin, bead etc (for the nose)
Small pom pom for the tail
Any other embellishments - ribbon, etc
Strong glue (craft glue, hot glue, etc)

1. Using your marker, color in the bottom of two of the clothespins to look like hooves (see picture above)
2. After the marker dries, glue the two clothespins together to form the body and four legs.
3. Turn the remaining clothespin upside down and glue the top part ( where it is not open) to the top of the body - as shown in the picture.
4. Place the googly eyes on the front and glue your nose in place
5. You can use the felt to cut out ears (as shown) a saddle and other details you may want to glue onto your reindeer. Glue your tail in place.
6. To finish tie a piece of skinny ribbon around the neck to hang on the tree or if you just want to give to someone as a toy, you can tie a little bow around the neck.

You can personalize it any way you want. Some ideas might include ....

~ A letter on the saddle
~ Putting glitter on the front of the antlers
~ Using something else for eyes or a nose
~ Paint your reindeer with craft paint and let dry before gluing your details

Have Fun!!!

Homemade Holiday Gifts

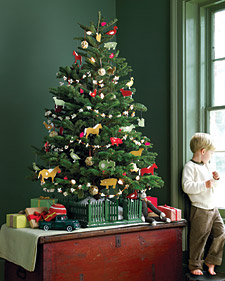
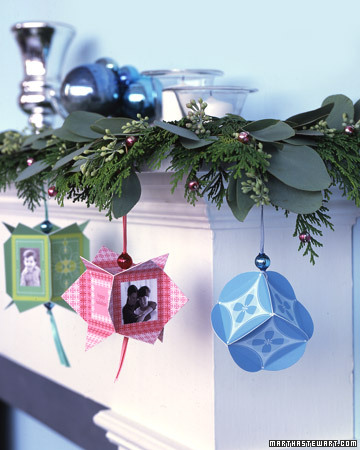
As promised, here are some great homemade gift ideas for adults and children to make this holiday season! There are some wonderful gifts here that I think anyone would appreciate and love to recieve. I am going to be posting a handful of my favorites - but there are so many good ones on the site! All of these gifts are featured on the Martha Stewart Website. I will post a picture of the craft and then underneath will post a link to the instructions. Please make sure to click on any templates included in the crafts featured here and additional crafts on the site. A lot of them include printable gift tags and labels as well. Happy Holidays!!!


Homemade Holiday Gift Tips....

~ Dress up parchment paper or wax paper with pretty tags, ribbon and other inexpensive embellishments and don't forget to make sure the paper for food gifts is food safe!

~ Use a site like Martha Stewart's that gives you templates to print your own beautiful gift tags for much less then the stores.

~ Take advantage of those Michael's, AC Moore and Joann Fabric coupons! You can use these to buy all of your gift embellishments and supplies. Take advantage of those sales, stock up and use those coupons to your advantage!

Click here for the full directory of Martha's gift how-to's including her Christmas Workshop!